Getting Started With Matters.Cloud
Introduction
Welcome to Matters.Cloud, your all-in-one cloud-based solution for modern legal practice management. Whether you're managing a bustling law firm, a corporate legal department, or operating as an independent practitioner, Matters.Cloud is designed to simplify and enhance the way you handle your legal operations.
In this guide, we will walk you through the initial steps to get started with Matters.Cloud. From setting up your account to navigating the dashboard, and utilising key features, this article aims to ensure you have all the necessary tools and knowledge to leverage Matters.Cloud for enhancing your practice's productivity and organization.
Here's what you can expect to learn:
- Setting Up Your User Profile: Create and configure your Matters.Cloud profile to suit your practice's needs.
- Navigating the Dashboard: Understand the layout and components of the Matters.Cloud interface.
- Managing Clients and Matters: Learn how to add and manage client information and legal matters effectively.
- Financial Tools: How to track billable hours, generate invoices, and manage payments.
- Setting Up Integrations: Explore the integrations with other tools and services to enhance your workflow.
By the end of this guide, you'll be well-equipped to use Matters.Cloud to its full potential, allowing you to focus more on your legal expertise and less on administrative tasks. Let's get started!
Setting Up Your User Profile
Users will be prompted to create a profile when first signing in to Matters.Cloud, you can update your personal information to ensure that your account reflects your professional identity.
- Basic Information: Fill in or update your full name, job title, and contact details. Accurate contact information is essential if you intend to create outbound communications.
- Profile Picture: Upload a professional photo to personalize your profile. This can help colleagues and clients recognize you easily.
Navigating the Dashboard
The dashboard in Matters.Cloud serves as the central hub for all your legal practice management activities, providing a comprehensive overview of your most critical information at a glance. Upon logging in, you are greeted with an intuitive interface that displays key metrics such as upcoming deadlines, recent activities, and financial summaries.
The dashboard is configurable by administrative users, allowing you to tailor the tiles and data presented to specific roles within the firm. For further information, please refer to the following article: Managing Dashboards in Matters.Cloud.
Managing Clients and Matters
Create Your First Client
We suggest beginning by creating your first client. As you enter their information, you'll notice that the default Party Type is set to "Organization." This setting is ideal for businesses that primarily serve other organizations. However, if your clients are mainly individuals, you can adjust the default setting by navigating to Setup > Settings.
Note: It might be a good idea to also set the following values whilst you are there:
- Default country
- Default currency
Once you have created the client you can access it via the following locations:
- Clients > All clients
- Clients > My clients
It might be worth also adding an address for the client at this time, you can do this via the 'Address' tab on the client record.
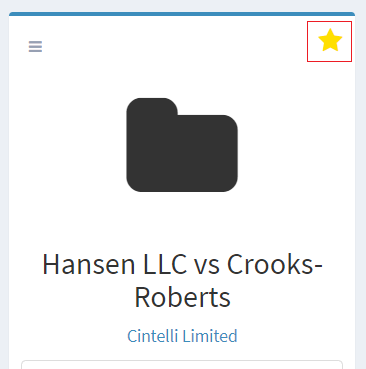
Create Your First Matter
After you've created a client, we suggest adding your first matter. When doing so, you'll see that the default matter type is set to "General." Matter types are useful for setting up predefined templates and defaults during the matter creation process. As you become more familiar with the system, you may want to create custom matter types that align with your specific areas of legal practice. You can do this by navigating to Setup > Matters > Matter Types.
Once your Matter has been created successfully, you can access it via the Matters > All matters menu item. To make it easier to find in future I recommend clicking on the 'Add to favorites' button. This will allow you to access it directly from the Dashboard.
Financial Tools
Create Your First Time Entry
Before entering your first Time Entry we recommend creating a new default rate for your user record. You can do this via the Setup > Time > Rates menu. Further information on rates is available via this link.
Once you have setup your default rate you can now start to record time on your Matter. You can do this via clicking on Time > Time entry, or by clicking on the Time Entry button on the Matter Profile card.
Once you have setup your default rate you can now start to record time on your Matter. You can do this via clicking on Time > Time entry, or by clicking on the Time Entry button on the Matter Profile card.
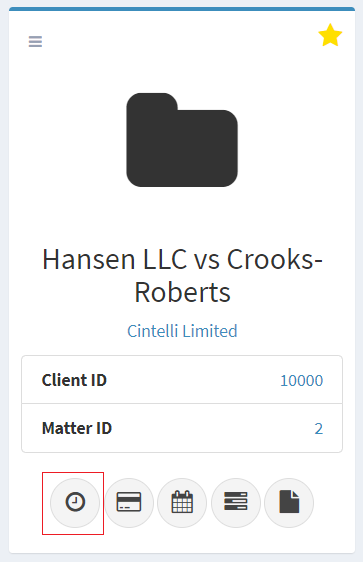
Note: We also allow you to enter matter related expenses and the process is very similar, so I recommend you also try out the Expense button just to the right of that shown in the image above.
Explore Your First Matter
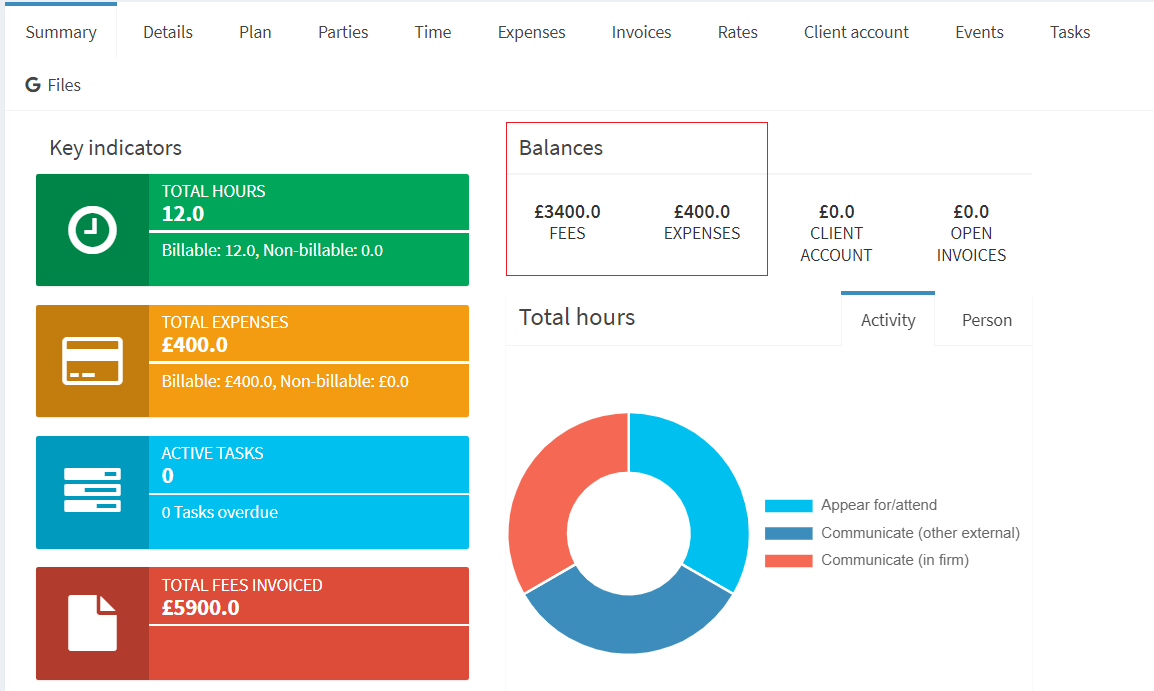
As you enter more transactions you will see that the Balances section on the Summary tab will update automatically.
I recommend also trying out the following at this stage:
- Add a new Matter Contact via the Contacts tab. Matter Contacts allow you to keep track of other contacts / organizations who are involved in the matter. Note you may need to configure some relationship types eg 'Other side solicitor' via Setup > Matters > Relationship types.
- Try adding a new specific rate for the Matter via the Rates tab. Then record another time entry and see how it applies the appropriate rate.
- If you need to track Trust / Client Account balances you can do this via the Trust tab. (note in UK english this displays as Client Account as per the diagram above). This will also update the corresponding balance on the Summary tab. You will need to configure a bank account via Setup > Trust > Bank accounts to use this feature.
- Try adding a reminder Task (eg a Court Date or a Reminder to Call via the Tasks tab.
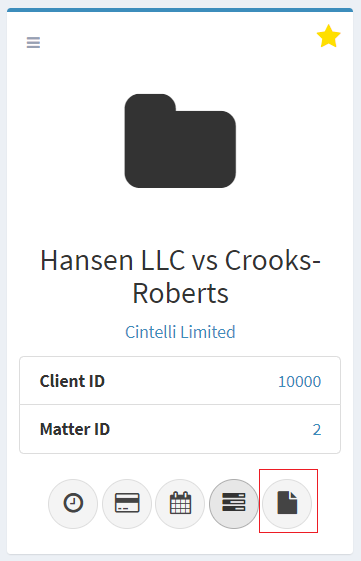
Create Your First Invoice
To get started with invoicing you first need to configure a Bank Account via Setup > Invoices > Bank accounts, this will be used on the invoice as part of the remittance details.
You will then be in a position to start raising your first invoice, This can be access via the button on the Matter profile card:
This will open the New Invoice form:
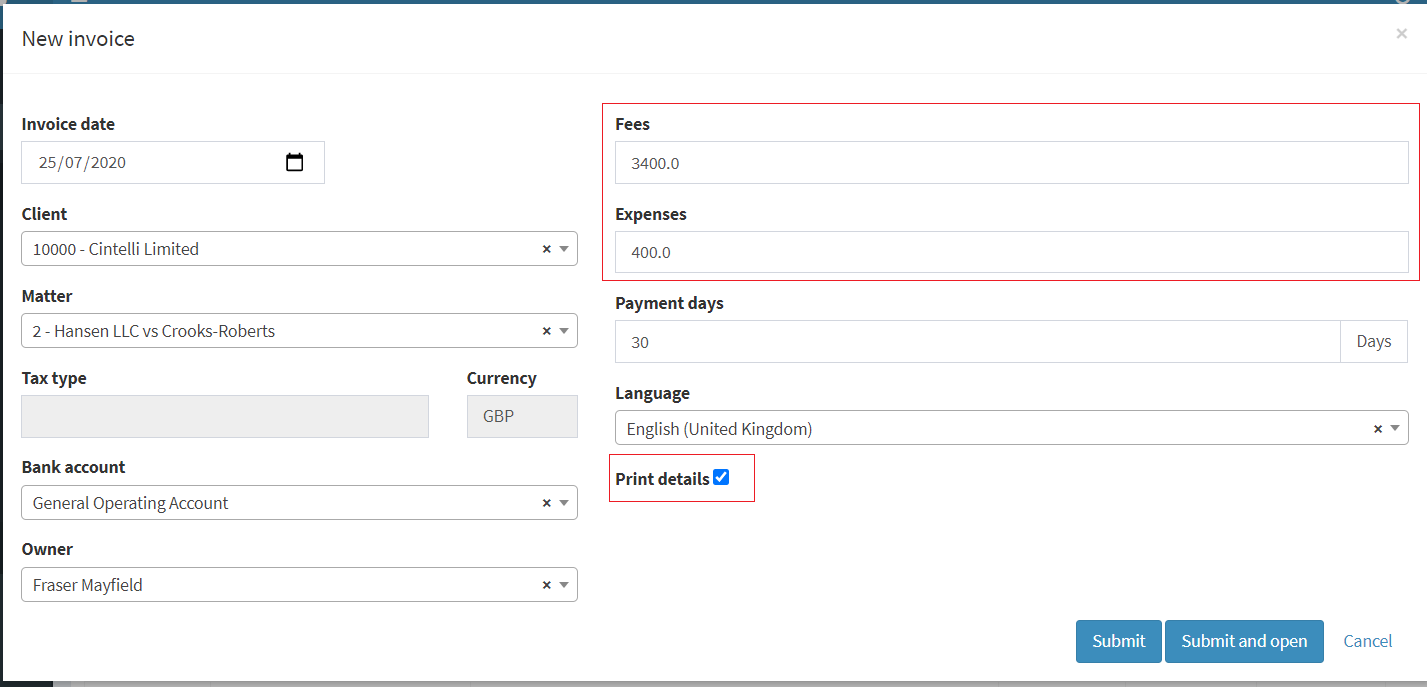
Note that the Fees and Expenses amounts will be automatically populated, I recommend clicking on Print Details and then clicking Submit and Open.
You will then see the Visual invoice editor screen:
We also recommend also trying out the following at this stage:
- Edit an existing line item by changing the value
- Add a new line item (eg A fixed fee) by clicking the New invoice item button
- Output the invoice to PDF by clicking the PDF icon on the Invoice profile card
- Edit an existing line item by changing the value
- Add a new line item (eg A fixed fee) by clicking the New invoice item button
- Output the invoice to PDF by clicking the PDF icon on the Invoice profile card
Setting Up Your Integrations
Setup Your Document Repository
We support using either OneDrive, NetDocuments, DocMoto, Dropbox or Google Drive for storing your Matter related documents. Essentially Matters.Cloud will automatically create a folder for each new Matter or Opportunity created on your nominated account. You can then use native applications such as Microsoft Word or Google Workspace to create and save documents.
The following links provide a guide to setting up the integrations:
Setup Your Accounting Integration
Matters.Cloud can either run standalone or in conjunction with your choice of cloud based accounting platform.
The following links provide a guide to setting up the integrations:
Summary
The above guide will have shown you the basics of how to create clients, create matters, record time and expenses, store documents, create tasks, raise an invoice and setup integrations.
Related Articles
Messaging: Getting Started
Overview Messaging by Matters.Cloud allows you to send SMS messages directly from within the Matters.Cloud application to over 150 countries. Setting Up Messaging by Matters.Cloud The integrations portal allows you to configure integrations with ...Document Automation: Getting Started
Overview Matters.Cloud includes a document automation engine that allows you to quickly and easily generate document based on pre-defined Microsoft Word Templates. Whether you need to create contracts, legal documents, or other types of business ...Working with Timers in Matters.Cloud
Introduction The Timers feature in Matters.Cloud allows users to accurately track and submit the time they spend on matters. This guide walks you through how to start, pause, stop, and submit time using the Timer panel, as well as how to manage ...Is Matters.Cloud A Cloud Based Application?
Answer Yes, you need an active internet connection to use Matters.Cloud.What Data Can I Migrate From Leap To Matters.Cloud?
Introduction When transitioning from LEAP to Matters.Cloud, it's essential to understand which types of data can be migrated to ensure a smooth and successful transfer. This knowledge base article outlines the various data categories that can be ...